How to Use Night Mode on the iPhone
Using Night Mode in iPhone's Camera App
One of the coolest stealth features of the new iPhone 11 and 11 Pro cameras is Night Mode. It’s a stealth feature in that you’ll never know you have it if you don’t push the envelope by taking pictures in very low light without a flash. When you do, the bright yellow Night Mode button (see above) shows up on your screen to offer that as an option.
The quality is not as good as a properly lit photo would be, and because it’s a long exposure, anything moving in the image may be blurred. For me, though, the look and feel of a Night Mode shot is more authentic and appealing than most pictures taken with the flash. And by applying some simple color editing, you can also get a nice range of effects from the Night Mode original.
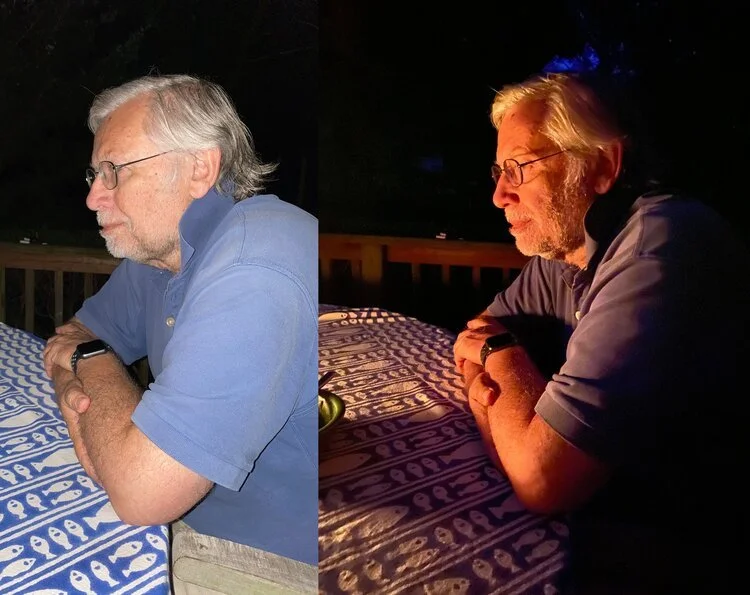
Flash (left) vs. Night Mode (right)
In these examples, our family had a candlelit dinner on our deck in the no-power aftermath of Tropical Storm Isaias. Pam got these shots by the light of 2 candles and some lingering dusk. Pretty great by any prior standards. This new iPhone technology reduces camera shake and it combines information from multiple exposures to give you a sharper, higher quality, image than before.
As you can see, the candles gives off a warm, orange light that is captured in the pictures.
Using the Color adjustment in Photos made the photo more normal looking.
Going with the black and white slider did a nice job too.
It's terrific to have a dedicated mode for low light situations that used to be too tricky for the average person to capture. Give Night Mode a try yourself and see what you can do with low light photography.
1) Turn off your flash
2) Look for the yellow Night Mode icon
3) The number on the icon tells how many seconds the exposure will be
4) Choose the 1x lens (see top photo)
5) Frame your picture and hold the iPhone as steady as possible
6) Take the picture


